Welcome!!!
As my blog name suggests, this blog will be like a learning journal. I won't go step by step on each dessert on what to do, but instead focus on the technique(s) I was learning and what I discovered while in the process of making it. I hope you will learn a thing or two, or if anything, use this as a reference and get ideas for your dessert-making. Happy decorating!
Monday, August 29, 2011
Thursday, August 11, 2011
Independence Day Treats
Rice Krispies treats cut with cookie cutters, buttercream frosting
Focus-having fun trying out different borders and techniques
I was itching to decorate something and I thought it would be fun to decorate rice krispies treats for Independence Day. For one thing, rice krispies treats are easy to make and clean up, and they also can be cut with cookie cutters pretty easily. I used plastic cookie cutters, but any kind will most likely work. I wanted to try out a few different borders and things so I will list the techniques used with each picture.
Red, White and Blue Basketweave Star
Techniques Used-basketweave
There isn't much to say about the star except that I think it turned out nicely. I would've used a star tip for the red if I had one available, but it still looks good using a round tip. I didn't use a basketweave tip for this star.
Blue Firework and White Star
Techniques Used-star, dot, E-motion border
For the Fireworks, I used one tip only. To get the different sizes of stars, I changed the pressure. Next time, I will try to just do one size to see what effect that gives. By the way, I think the cookie cutter shape may be called "Blue Ribbon." It wasn't part of the Independence Day set. For the star, I did an E-motion border in white and then added blue and red stars for color.
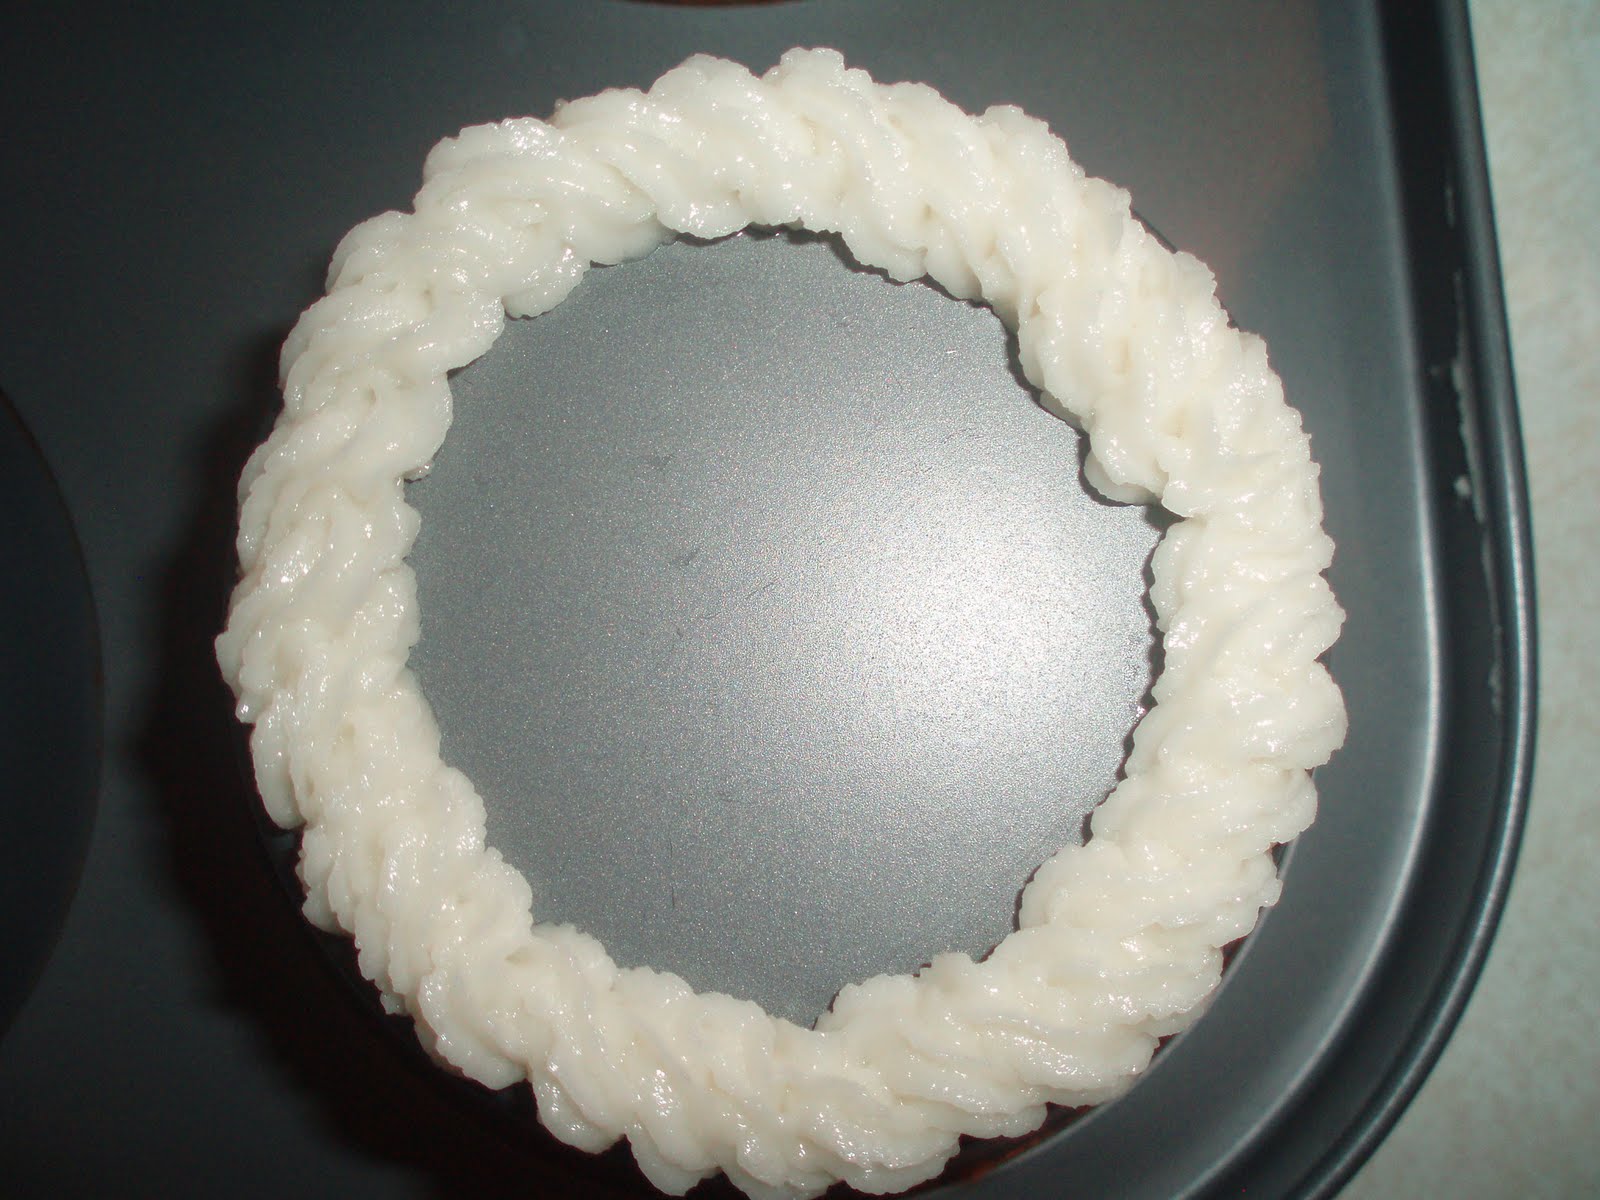
Braided Star
Techniques Used-star, braid, Fleur de lis
This was the one I was most excited to try, the reason being that I wanted to try out the braid as a border. I hadn't seen that in any of my decorating books, so thought it might not be a common border. I'm glad with how it turned out. The Fleur de lis is in the middle. To make a Fleur de lis, you start with a shell down the middle. Then you do a reverse shell on both sides of the shell. Pretty simple, yet elegant.
Reverse Shell and White Flower Star
Techniques Used-reverse shell border, star flower
I like the look of the reverse shell, but I think the hardest part for me is remembering which way to go. I saw a YouTube video where the decorator was doing it really fast, and I thought I would try to do it fast too. It didn't work out in certain areas, but she did an amazing job on her cake.
United States Flag, White Stars
Techniques Used-star, dot, writing, Fleur de lis
Next time, I think I will spread red frosting and then pipe white stripes. These didn't turn out as well as I would've liked. Part of it was that the rice krispies treats formed to the plate after, so the flagpole was originally straight. Also, I was piping the red frosting the way I would for writing (slightly above the treat) when I needed to pipe directly onto the treat. Live and learn, right? The two white stars are just a bunch of stars and then dots on the corners.
Cowboy boots, Red and Blue Stars
Techniques Used-piping, star, dot, shell
The cowboy boots were fun to do. I learned from the flag that I needed to pipe closer to the treat than with writing. Also, when I cut out the boots, I used the same cutter, but flipped it over to make the second shoe. Both stars use shells. The difference is that the red one uses two little shells for each point, while the blue one uses one.
Braided Cowboy Hat, Blue Star, Fireworks
Techniques Used-braid border, star, zigzag/shell border, dot
I thought the braid would look good on a hat, plus I wanted to try the braid border again. The blue star is something I thought I saw on a video, but I can't find the video anymore. It's just a shell with a slight side-to-side movement. I think it had a nice effect, adding texture to a simple star.
Another USA Flag, Rope Border Cowboy Hat
Techniques Used-rope border, star, writing, dot
I've already discussed how to make these, but I thought you would like a closer picture of these as well. I think this flag looks much better, even with the bent flagpole.
These Rice Krispies Treats were decorated July 2011.
Friday, June 17, 2011
Sweet Pea Cake
8" round yellow cake, buttercream frosting
Techniques Used-sweet pea flower, shell border, leaves
Focus-sweet pea border
In one of my Wilton books, there is this cake that uses the sweet pea flower for the borders as well as on the sides. Although this is nothing like the picture in the book, I wanted to try out the sweet pea border. I chose to do this cake because I only wanted to use one batch of frosting (3 cups). This flower uses very little frosting, covers quite a bit of space, and makes a unique border.
Since I was trying to stay within 3 cups of frosting, I had to determine the colors I wanted beforehand. First off, having the cake frosted white meant that whatever frosting was left over could be used for the design. I didn't measure it, but I think there was 1/2-3/4 cups of frosting left over. (On a side note, I didn't fill as much between the layers as I normally do, so a good estimate for frosting an 8"x4" round is 2 1/2-3 cups of frosting.) Secondly, with the flowers being blue, I could add yellow to the frosting once I was done with piping the flowers or vice versa. I was able to make my goal and had about 1/4-3/8 cups of frosting to spare.
This cake was decorated June 2011.
Wednesday, June 15, 2011
Majestic Roses II
8" round chocolate cake, buttercream and chocolate buttercream frosting, peanut butter fudge filling
Techniques Used-Wilton rose, shell border, leaves
I've done this cake before, but this one is slightly different. There are two roses in the middle this time, and I used tip 47 for the shell border, instead of the usual tip 21. I did this because I use that tip for the vertical chocolate lines and I thought it would add uniformity to use the same tip. I learned with this cake that frosting consistency really matters. For example, the roses call for stiff consistency, but if it's too stiff (which is my tendency) then the edges of the petals won't be smooth, and they also take longer to pipe out the frosting. I used to think that roses were a pain because of how long they took. I think this time I made 20 in about 70 minutes, which I know isn't as fast as professionals, but it's much faster than what I was doing before.
This cake was decorated May 2011.
Tuesday, June 7, 2011
Sunshine Flourishes Cake
8" round vanilla cake, buttercream frosting
Techniques Used-carnations, ruffles, shell border, leaves
Focus-carnations, ruffles
I got this cake idea from The Wilton School Decorating Cakes-A Reference & Idea Book. The cake in the book had ridges from a decorating comb, but unfortunately, I didn't make the frosting thin enough. Also, the ruffle is with a bigger tip (Tip 127D), but the local craft stores didn't carry the tip needed. If you plan on doing this cake, I would see about ordering the tip online.
I think carnations are easier flowers to make than roses, and more unique from flower to flower as well. You can probably find pictures or videos online, but it's basically a bunch of zigzag motions over a mound of frosting.
The ruffle was easier than I expected. Granted, it may be harder with a larger tip. I ended up using tip 125, a larger size of a rose tip (104). I practiced the ruffle on the bottom of a plate many times before doing it on the real thing. I focused on keeping the wide end of the tip on the cake and then moving the pointed end up and down.
This cake was decorated May 2011.
Labels:
2011,
buttercream,
cake,
carnations,
flowers,
ruffle
Wednesday, June 1, 2011
Koi Fish Cake
This is another example out of my favorite cupcake book What's New, Cupcake? by Karen Tack and Alan Richardson. I made this with the extra cake I had left from the State of Texas Cake, so it's technically not a cupcake, but that's alright. In each chapter of the book, they have an "EZ" cupcake idea, and this is one of them. Anyway, I still think the book is great and recommend it.
This cake was decorated March 2011.
State of Texas Cake
11"x11" custom cut vanilla cake, buttercream frosting, coconut, white melting candy chocolate, Oreo Stix
Techniques Used-candy border
Focus-custom cutting a cake
This cake is probably one of my favorites. It turned out exactly the way I pictured it in my head. I have been wanting to make a custom cut cake and the opportunity presented itself in March. Of all the states in the US, Texas has one of the best shapes for a cake, at least in my opinion. Also, if you've ever lived in Texas, you would know that Texans have the strongest state pride as well. I lived in Texas for a while and I saw so many different appliances shaped like Texas (like a waffle maker), houses with a Lone Star or the State of Texas on them, and even a jacuzzi in the shape of Texas! Anyway, this was a fun cake to make, and fairly straightforward.
I wanted to quickly explain why I decided to use these materials. First, the coconut. As with most state flags, the Texas Flag has bold colors. I'm sure you've noticed this with other cakes, but red frosting can have a really sour flavor, and if you've ever made red frosting, you have to use a lot of red dye otherwise it looks pink. Can you imagine having a pink Spiderman? Anyway, using coconut solved both of these problems. I think I used 4-6 drops of red dye on the coconut, far less than what you would use to dye frosting. The same amount was used for the blue coconut. There wasn't a sour flavor either, probably because we used so little dye. I also decided to use coconut because it would add some texture.
Secondly, the Oreo Stix. Although I was really looking forward to making this cake, I didn't have a lot of time to do it. Since I used Oreo Stix and coconut, I didn't have to worry about smoothing the cake. I'm still very slow at smoothing a cake, and this cake would've been a nightmare to smooth. I just had to cut each stick in half and attach it to the frosting. Simple, yet effective.
I also wanted to mention that it was really easy to make straight lines with coconut. You just put a cutting board or something else with a straight edge where you want to end the coconut and then start dumping the coconut. Again, this took hours off (5 min. for coconut vs. 1-2 hours for frosting), and I think it looks much better than I could've done with frosting. The same with the Oreo Stix. Very sharp and crisp corners, and it further outlines the shape of the cake.
Lastly, the white melting chocolate. I wanted something that would be the same shade of white as the white coconut. Also, with melting chocolate, you can create your own design, so I just drew a star on a sheet of paper, put wax paper on top of the paper, and then drew the outline and filled in with the melting chocolate.
Custom Cutting Materials-stencil of the shape you want, knife
Custom Cutting Directions-I got my stencil from the Internet(http://www.bobdavisart.com/knowledgebase/images/texas/dac10004.gif). If you are wanting to print this one, change your settings so that it will print this picture onto four pages (my printer called it "poster"). It will then end up being 11"x11". Cut off the excess paper before placing it on the cake.
Have the cake layered and filled before cutting the cake, but don't crumb coat. I used two 9"x13"'s stacked on top of each other. Place the paper or stencil on top of the cake. Stick toothpicks or something similar into but not all the way through the stencil and cake to keep the stencil from moving. I put my toothpicks 1/2" away from the edge, and 2" apart. Cut the cake at a vertical (or otherwise desired) angle.
If the cake is a different size from the stencil (like above-11"x11" out of 9"x13"), you will still do the steps as above, except that you will have to choose a portion of the stencil to cut later. With this cake, I attached the blue square at the top of the cake after cutting out the rest of Texas. When doing this, keep the stencil on top of already cut cake as you attach the extra cake. You can attach extra cake with frosting. Also, don't cut the extra piece until it's attached to the main portion. Once it's attached, then add your toothpicks and cut away!
This cake was decorated March 2011.
Subscribe to:
Posts (Atom)